Lights. Camera. Jargon! A Guide To Understanding The Top 20 Video Production Terms
Video production is a powerful and rewarding process, but it often involves technical language and terminology that can be daunting to those who are new to using video in their marketing plans.
Whether you’re a beginner, a seasoned pro or you’re about to work with a video production crew for the first time on a client project, having a basic understanding of the language used will help you navigate the world of video production with ease.
So, to help get you started, here’s a blog to demystify the 20 most commonly used video production terms.
Top 20 Video Production Terms
Footage or Rushes:
Raw, unedited video that has been recorded.
Frame:
A single still image in a paused moment in a video.
Frame Rate:
The number of frames recorded or played back per second. Generally, videos are between 24 and 30 frames per second
Aspect Ratio:
The proportional relationship between the width and height of a video image. This is often different between social platforms so knowing where you’re posting is important in choosing the right aspect ratio.
Resolution:
The number of pixels in a video image, typically measured in width x height. The higher the resolution, the higher the quality, but also the higher the file size, which might mean viewers online with slower bandwidths might experience buffering issues.
Keyframes:
Frames in a video that contain complete data and are used to define the starting and ending points of a change. These are particularly essential in animated videos.
Green Screen:
A technique used to replace the background of a video. Filming takes place against a solid colour (usually green but can also be blue) and everything of that colour is made transparent in post production.
Compositing:
The process of combining multiple video layers into a single image. For example, adding a text title over footage or replacing a background in a greenscreen video
Non-linear Editing:
The process of editing video using a computer-based system, as opposed to traditional linear editing methods where reels of physical film were cut with scissors and glued together
Render:
The process of creating a final video file from an edit.
Sync Sound:
The process of synchronizing audio and video tracks in a film or video production.
Audio Mixer:
A device used to adjust the balance of audio signals from multiple sources.
Boom Mic:
A long, handheld microphone used to capture audio on location.
Cut (or edit point):
A transition between two shots in a video, typically achieved by cutting the image and audio abruptly.
Fade:
A transition between two shots in a video, in which the image and/or audio gradually fade in or out.
Dissolve:
A transition between two shots in a video, in which one image slowly fades out as the other fades in.
Pan:
A shot in which the camera moves horizontally from one side to the other.
Tilt:
A shot in which the camera moves vertically, either up or down.
Zoom:
A shot in which the camera’s field of view appears to be getting closer or further away from the subject.
There are many technical terms used in the world of video production, but hopefully this short list provides a start for anyone looking to communicate with professionals in the industry.
If you would like to discuss how Dead Ready Productions could help with your video production requirements, please feel free to get in touch via the button below or by calling +44 (0)208 339 6139.
1 Camera vs 2 Cameras – Which Interview Filming Approach Is Best For You?
When filming an interview, you’re often choosing between using one or two cameras.
Mike Plenty, Managing Director at Dead Ready Productions, explains the benefits of each in the first of our 60 second production tips vlog series. The content of which can be found below.
The Pros Of Using 1 Camera
A single camera is the simplest and cheapest approach to filming an interview.
It minimizes the physical space required for filming and can be less daunting for nervous interviewees
Having only one angle makes it easier to control what’s in the background of the shot. And it’s also best when your interviewee is speaking down the lens
The Pros Of Using 2 Cameras
Adding a second camera gives you another angle throughout the interview. This then allows you to easily cut different takes together while maintaining an illusion of continuity.
This is massively helpful as it reduces pressure on your interviewee to deliver long perfect takes. Being able to cut to a close-up shot also allows for a more dynamic final edit.
In short, a second camera provides you with creative options.
For more helpful information, top tips and useful guides on video production, keep an eye out for our next 60 second production tips vlog – coming soon!
In the meantime, if you have a filming brief, or you would like to find out more about the animation, photography and graphic design services Dead Ready Productions can offer your business, simply get in touch via the button below or by calling +44 (0)208 339 6139.
The Ultimate Planning Guide To Filming Your Conference Presentation
When organising videography for your conference, you first need to be clear on the type of video you want to create.
To ensure your video delivers above and beyond, there are some key considerations you should take into account beforehand, which will help your production crew both on the day and during the editing process afterwards.
Providing your production crew with certain information before your event, will ensure they are as prepared as possible for the big day!
In this article, we explain the key considerations you should take as well as the information you should supply to your production crew, in advance of your conference, to ensure you get the most out of your event.
Pre-Event Key Considerations
Confirm Your Objective
It sounds obvious, but knowing exactly what you want to achieve by filming your event is hugely important, and yet often overlooked. Are you looking to record the event for an audience unable to attend on the day?
Provide a recap for those who were in attendance? Or are you looking to create a promotional video to boost sales and marketing for your next event? Just three examples, but all benefitting from a different filming approach.
Create A Filming Schedule
Try to avoid ‘winging it’ on the day and deciding what to film while the event is actually in progress. Working with your video supplier to develop a filming timetable beforehand that corresponds to your event programme will help you to make sure that you’re getting all you need and can highlight any logistical issues – particularly when multiple cameras are involved and more than one type of video is being created.
It’s not unusual for requirements to change on the day and the crew will need to be flexible, but a schedule provides an important starting point.
Consider Combining Videography And Photography
One of the challenges of running an event is having to deal with many different suppliers. Using the same team for both video filming and for stills photography can help with this, saving you time when it comes to briefing people on what you need, and generally simplifying the process.
Of course, you need to be absolutely sure that the team you’re working with has the capability to deliver on both fronts.
Decide How To Use And Distribute Your Video
Many don’t think about this until the video has been created, but it’s worth considering – will it go on your webpage, social media channels, how will you notify people when the video is ready?
Knowing the answers to these questions beforehand can influence the filming approach taken by the crew, and will lower the risk of hold-ups and delays in post-production since the distribution strategy has already been agreed.
Review Previous Experiences
If you’ve worked with video production teams at events before, make the most of this and think about what worked and what you would like to do differently. Focus less on the process but more on the outcome of the video – did it achieve what you wanted it to and why/why not? Refining the process is an important part of ensuring that each video surpasses the one before.
Having provided video and photography services for a wide range of events, both across the UK and Internationally, the team at Dead Ready Productions are no strangers to working with a brief that’s less than fully developed, but we can work with you to ensure the end result exceeds your expectations.
Pre-Event Information To Supply Your Production Crew
Nine times out of ten you will have an audio visual team at the venue operating a sound desk and managing microphones on the stage, in addition to the camera crew. Clean, high quality audio is absolutely essential when filming a conference presentation, so ensuring everyone involved shares their contact details prior to the event is key.
Arranging a pre-conference call between the camera crew and the audio visual team is also the simplest way to ensure that both parties are aware of what’s needed and can communicate with each other without any issues both pre and post the event should they need to.
Agenda And Slide Content
It’s useful for the production crew to know the event agenda in advance as it will allow them to plan the day with maximum efficiency. It’s also helpful to give them as much information as possible about the content of the slides – how intricate and detailed are they; are there animations and/or videos involved? Are they in a format other than PowerPoint? Will the crew be able to get hold of the original PowerPoint files on the day?
The answers to these questions may affect the filming approach. Of course, not every presenter uses slides, so it’s useful to know if that is the case as well.
Number Of Presenters
If there will be more than one speaker talking at a time, or a panel discussion, this will have implications for the number of cameras needed, the positioning of those cameras and the approach to audio recording on the day.
Be sure to confirm the number of presenters prior to the event and update your production team if there are any changes, no matter how last minute, so they can make the necessary alterations to the set up.
Audience Involvement
Everyone loves an interactive presentation, with the exception of an unprepared camera crew! If there’s a great deal of audience involvement and you want to feature this in the video, then you need a minimum of two cameras and you need to consider how audio will be handled.
A roving handheld or boom microphone is the most common solution as this type of microphone is critical to getting clear audio for the video – you just have to make sure there are people in position to move these microphones swiftly to where they are needed.
Lighting
A common misconception is that the biggest lighting challenge for the camera crew is the amount of available light in a conference venue. In practice, it is usually the contrast between a very bright screen and a dimly lit lectern or podium that causes the biggest challenge.
A regular occurrence at conferences is having a very narrow spotlight on the stage, which in most cases the presenter will promptly step out from under and then deliver the rest of their presentation from the shadows. There are various ways to deal with these issues, so knowing the lighting set up at the venue will allow your production crew to come prepared.
Room Layout
Knowing the layout of the room is very useful, particularly for multi-camera shoots, as it allows different camera positions to be considered. If time permits, a pre-shoot location recce, where the room is set up as it would be on the day, is the best way to do this.
Filming Notices
Check if any of your presenters have any sensitive or copyright material in their presentations which should not be recorded. It also helps to inform them if you are filming their presentation in full, or simply capturing a few snippets for inclusion in a short promotional film.
Ask anyone who is filmed directly at the event to sign a release form as this will help avoid any issues at a later stage when you come to share and promote your event. Template release forms can be provided by the production company in advance, which you can tailor to your event.
If you are in the process of arranging a conference and you were considering filming the presentations, then we hope these useful tips have been helpful.
If you would like to discuss how Dead Ready Productions could help with filming your event, please feel free to get in touch via the button below or by calling +44 (0)208 339 6139.
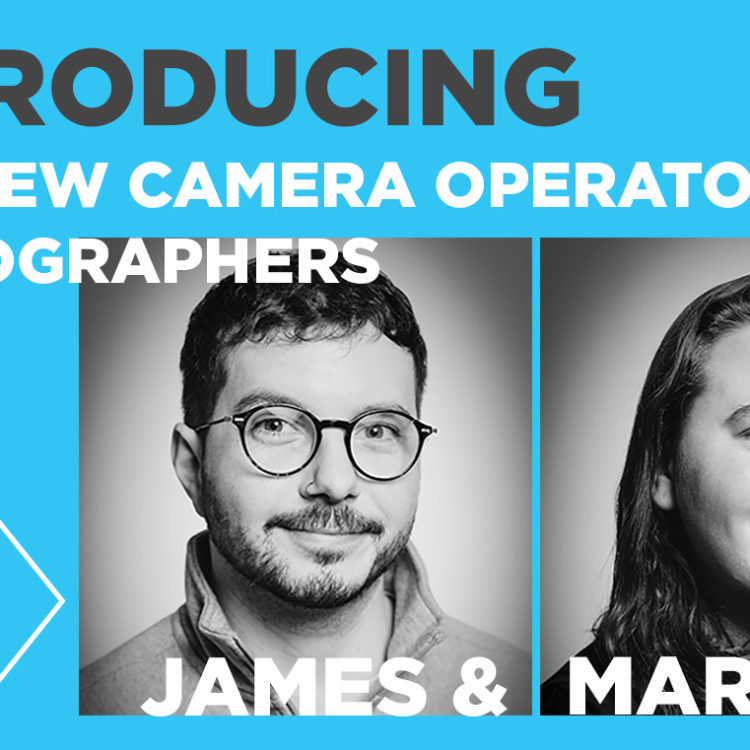
Dead Ready Productions Expand The Team With Two New Appointments
Dead Ready Productions appoint two specialists to expand the company’s video and photography offering.
Having worked as a videographer and editor at creative agencies and video production companies, James Shaw joins Dead Ready Productions with a wealth of video production experience. His passion for shooting is almost equaled by his love of crafting a story in the editing suite – combine this with his love for travel and he’s the perfect addition to the team.
Born in Norway and having moved from Leeds within a week of completing her MA to be part of the Dead Ready team, Martine Lund is no stranger to new challenges and thrives at the prospect of taking client briefs beyond their expectations. With a curious mind and speedy ability to problem solve, Martine joins having completed a BA in Photography at Leeds Arts University followed by an MA in Media Production at York St John’s University in York.
Mike Plenty, Managing Director at Dead Ready Productions comments about the new appointments;
“With our workload ramping up we needed to grow our team. We were thrilled to find two candidates who stood out from an impressive field of applicants with their combination of technical skills and passion for their work. We’re excited to bring James and Martine on board and take our offering to the next level.”
Chris Tongue, Creative Director at Dead Ready Productions adds;
“This is a very exciting time for our business. Expanding our already talented team to include James and Martine is a very proud moment for us and is one that will benefit our clients going forward.”
Founded in 2009, these latest appointments cement Dead Ready Productions growing reputation as an exciting and progressive video production company and demonstrate the company’s continued success in what is an incredibly competitive industry.
Working with an eclectic mix of clients, from property, healthcare and finance companies, to live music and theatre events, through to transport and the food industry, Dead Ready Productions consists of a talented collection of animators, camera operators, graphic designers, photographers, project managers and editors.
The team work closely in collaboration with Creative Director, Chris Tongue and Managing Director, Mike Plenty, to ensure all projects push creative boundaries whilst at the same time providing a personable, friendly experience which ultimately exceeds client expectations.
If you would like to find out how Dead Ready Productions could help you with your next video, animation or photography project, simply get in touch.
The Spooktacular Art Of Stop Motion Animation Comes Alive On Halloween
Whether you love it or loathe it, Halloween is now the UK’s third most profit-generating holiday after Christmas and Easter – with a staggering £687 million estimated to be spent this year.
The popularity surrounding Halloween has exploded in recent years as popular culture moves more freely between countries and continents – what was once a much-loved holiday in America is now a staple on the calendar for UK households.
According to the social media management tool, Sendible, ‘the best Halloween marketing campaigns often feature clever storytelling with a heavy focus on video’. This was the perfect excuse (not that we needed one) to get the ghoulish juices flowing within the Dead Ready animation team.
In this article we showcase our Halloween-inspired stop motion animation, share some behind the scenes of how it was made, explain what stop motion is and the different styles of stop motion that exist, and provide a helpful ‘how to’ guide to carving the perfect pumpkin!
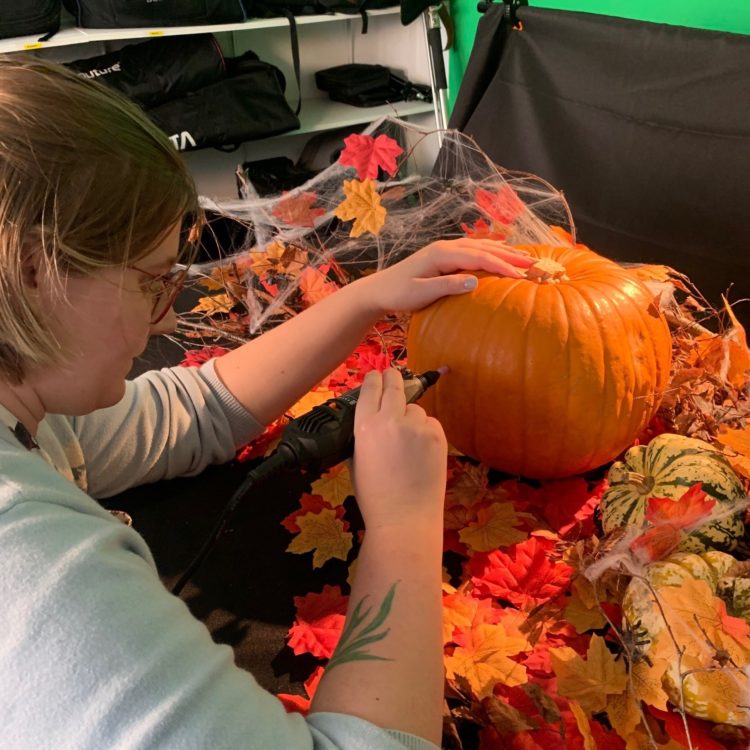
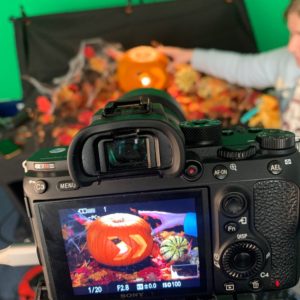
Behind the scenes
Animator, Mia Moore, talks us through the different stages for producing our Halloween stop motion animation.
Stage 1: Concept & Planning
The concept stage is the most important part of the stop motion process. Not only do we come up with the initial idea, but also what will be needed to achieve the final product. Props and decoration are one thing, but tools needed to achieve certain movements and effects also need to be considered. Stop motion is very physical, so if something inanimate were to jump, how would we suspend it in mid-air? There are a lot of unseen tricks to achieve seemingly simple actions, and this is the stage where we discuss what can be done.
For example, the idea to have the pumpkin close its eyes and laugh came from the very beginning, but it’s impossible to un-carve a pumpkin so we had to think backwards, from the last frame to the first, and figure out what could be done to achieve this effect. In the end, we carved the pumpkin in a very specific manner so it started off with closed eyes which could open and shut with some clever editing.
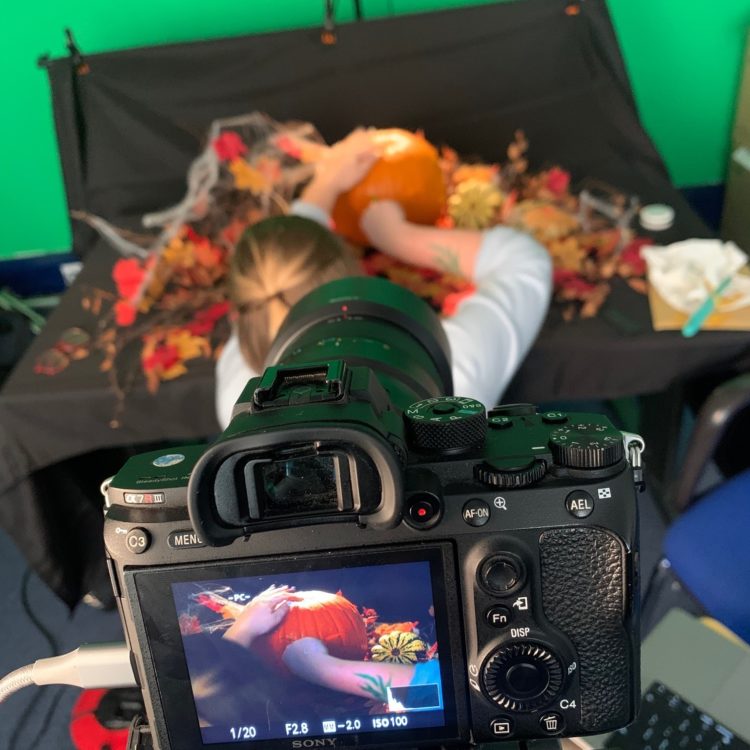
Stage 2: Set Design
A physical set was needed for this animation. We decided on a natural forest scene, with dead branches, leaves and cobwebs. It’s important to set up the camera first before building your set, as you only want to decorate where the camera can see. We wanted to keep the spooky atmosphere as natural as possible and let the light inside the pumpkin do most of the work, so we had to shoot the set in low lighting.
Stage 3: The Shoot
We used classic carving tools and with every small cut into the pumpkin, two photos were taken – when played in a sequence the pumpkin appears to be moving on its own. Being flexible and adaptable is very important on a stop motion shoot as no matter how much you prepare you have to accept that things could change last minute on the day. Despite taking longer to cut than we had anticipated, our shoot ran smoothly.
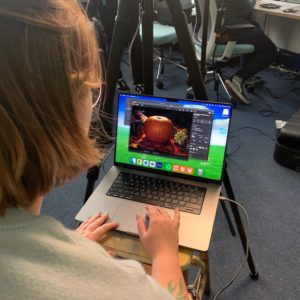
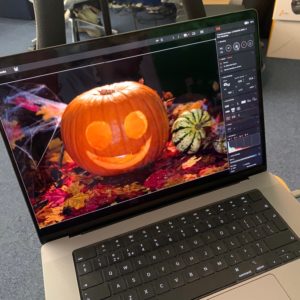
Stage 4: Editing
Raw camera footage can only go so far, so a lot of the time stop motion has to go through a post-production phase. This was especially true for our Halloween animation, as we had to edit some features of the pumpkin to play in reverse to achieve the impression of laughter. This was created using the masking tool in After Effects as I wanted to be able to animate the eyes and mouth separately so that they could create new expressions that didn’t previously exist in the raw footage.
Watch a time lapse video showing the making of our Halloween stop motion animation.
What is stop motion animation?
Stop motion is an animated filmmaking technique in which objects are physically manipulated in small increments between individually photographed frames, so that they appear to exhibit independent motion or change when the series of frames is played back.
What are the different styles of stop motion animation?
Object Motion
Uses the animated movements of any non-drawn objects such as toys or dolls, and similar items which are not fully malleable such as clay or wax, and which are not designed to look like recognisable human or animal characters. (Wikipedia)
Claymation
Involves the sculpture and frame-by-frame manipulation of clay-based characters or objects. The most famous examples of this technique are the multi-Oscar-winning duo Wallace & Gromit. (Adobe)
Pixilation
Live actors are used as a frame-by-frame subject in an animated film by repeatedly posing while one or more frame is taken and then changing pose slightly before the next frame or frames are taken. (Wikipedia)
Cutout-Motion
One of the oldest and most simple techniques there is, cutout motion involves making 2D animation using characters, props and scenes made from materials including paper. (Adobe)
Puppet Animation
Involves puppet figures that are animated frame-by-frame. Usually, the animators create a physical three-dimensional scene, similar to a small theatre, where the action will take place. (Toonboom.com)
Silhouette Animation
Pioneered by European studios during the 1920s, silhouette animation combines the use of cutout-motion and clever shadow play to produce fascinating frames of action. (Adobe)
It’s not a Halloween blog without a ‘how to carve a pumpkin’ guide!
We’ve prepared this quick and easy guide to help you through the steps of carving the perfect pumpkin.
Step 1. The Lid
Make sure that when you take the top off it is slightly cone-shaped. This will help make sure that when you place it back on the pumpkin it doesn’t fall into the middle. To do this, angle the knife downwards into the pumpkin to form a cone.
Top Tip:Use a small serrated knife. If you can find one that is slightly flexible it will help you go round corners when it comes to cutting out your design.
Step 2. The Innards
You now need to remove the seeds and the stringy tissue to form a centre cavern. To do this, scrape down the sides of the inside of the pumpkin with a robust spoon. Once you’ve worked your way around the entire contents of the middle, the innards should come out in one go.
Top Tip:Place a biodegradable bag over the entire pumpkin, tip the pumpkin upside down and all the innards will fall straight into the bag.
Step 3. Your Design
Once you’ve either picked your design from the hundreds of templates on the internet or sketched out your own, it’s time to draw or mark your outline on the pumpkin. A biro draws easily on pumpkin skin and if you make any mistakes, it can be rubbed off, but you can also use a large pin to mark dots along the outline which you can then use as a guide for your knife.
Top Tip: If you want to add an extra twist to your design try using black chalkboard paint on your pumpkin.
Step 4. Get Cutting
The best way to cut out your design is to trace over the lines you have drawn with the knife, piercing the skin by just a few millimeters – you don’t want to push through the full depth of the pumpkin just yet. Once you have your preliminary cuts you can now start carving through the full depth of the pumpkin. The deeper cuts will naturally follow the shallow cuts you previously made.
Start with the inner least structural parts of your design and work your way out. To ensure most light comes through, make sure that the direction you are carving is perpendicular to your outlines – you are going to be viewing your pumpkin from the front, so the light won’t shine through parts where the flesh remains. You can vary the amount of light showing in the design by cutting some areas to half depth.
Top Tip:Rotate the pumpkin as you cut out the various parts of your design, so the knife is always moving in the same direction. This will help improve the accuracy of your cuts.
Step 5. Lights On
When it comes to lighting your pumpkin there are electronic candles available which are safe for children, but for the best effect there’s no substitute for using two tea light candles placed inside your pumpkin.
Did you follow our pumpkin carving ‘how to’ guide?
If so, we’d love to see your pumpkin creations so share them and tag us on Instagram and Facebookusing the hashtag #DeadReadyPumpkin.
If you would like to find out more about stop motion or any other type of animation, please feel free to get in touch via the button below or by calling +44 (0)208 339 6139.